How to set up your Firebase credentials
Introduction
For sending out Webpushes, we connect to Firebase as a service for delivering your pushes to the client. Therefore, it is necessary to have your individual Firebase credentials, which are needed to deliver Webpushes to your website later.
Step 1 - Create a new Firebase project
-
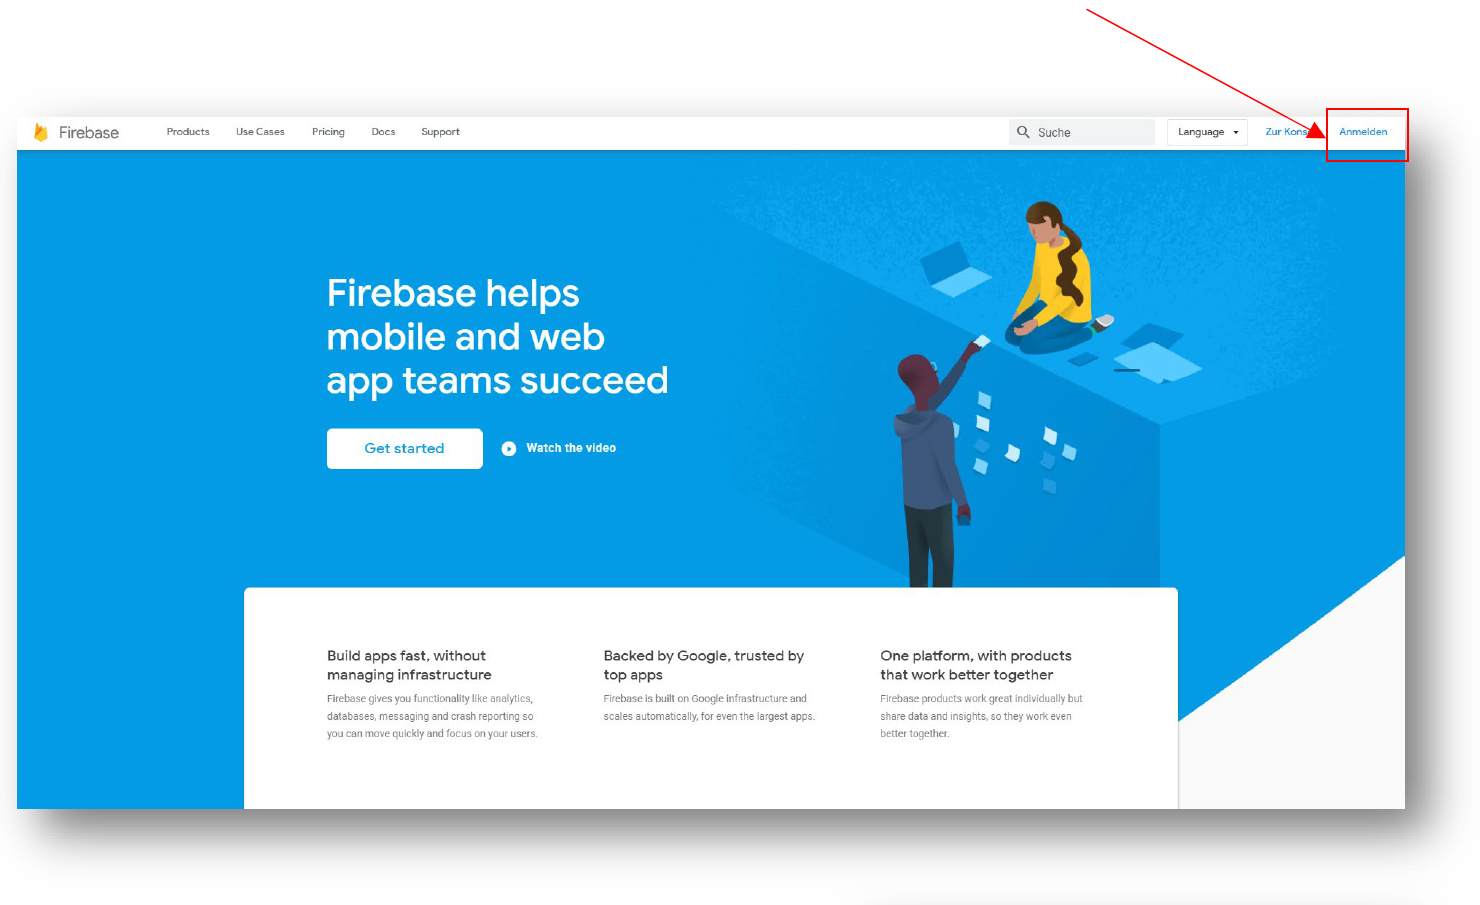
First, you need to navigate to https://firebase.google.com and login. If you do not have a Google account, you have to create one for you.
-
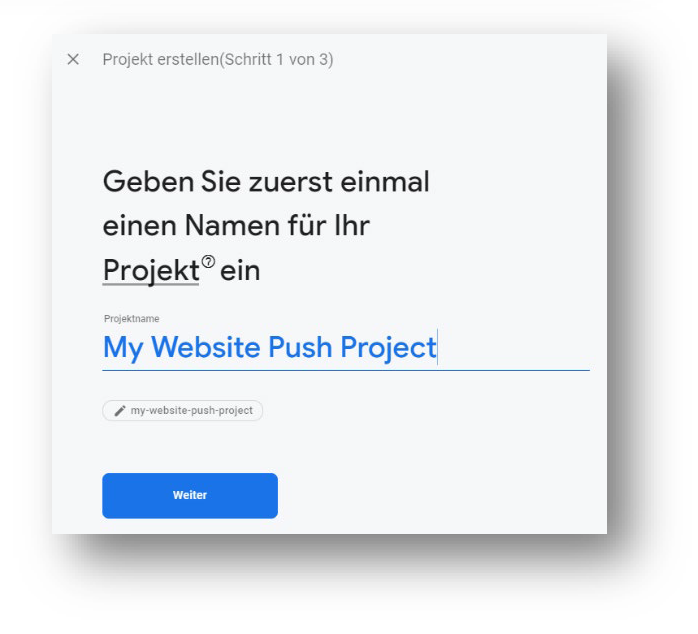
Then create a new project.
-
In our example we name it: “My Website Push project”.
|
Google Analytics
===
You can activate Google Analytics in the next step but it is not needed for the Push.
===
|
Step 2 - Create a Web-App
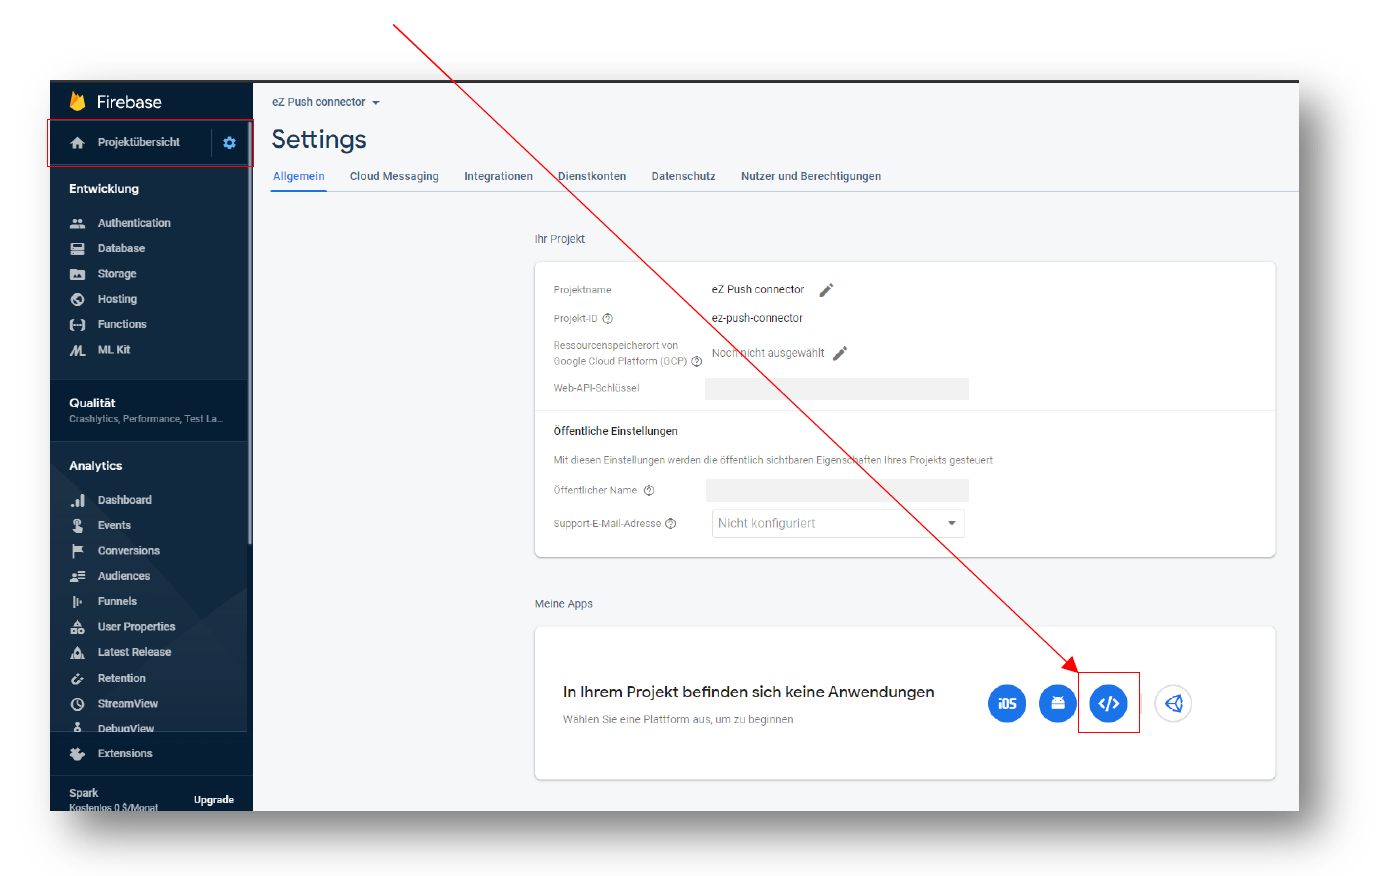
After the setup is finished navigate to “Project overview” and “Settings”. There create a Web-App.
-
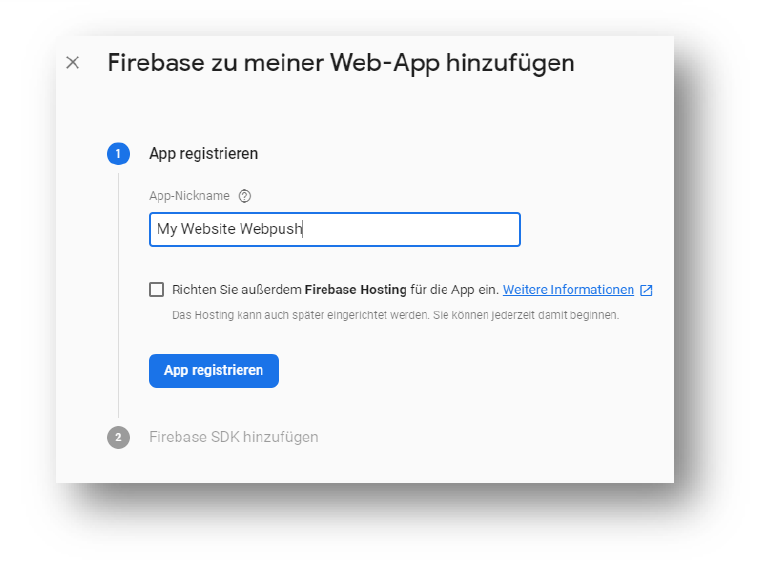
Here we name the Webapp for example: “My Website Webpush” Because the App is related to the Webpush functionality.
-
A Firebase Hosting is not neccesary.
|
Apps
===
In one Firebase project it is possible to have different Apps configured.
===
|
-
Now you have done all the steps which are necessary and you only need to get the right credentials.
Step 3 - Get your credentials
-
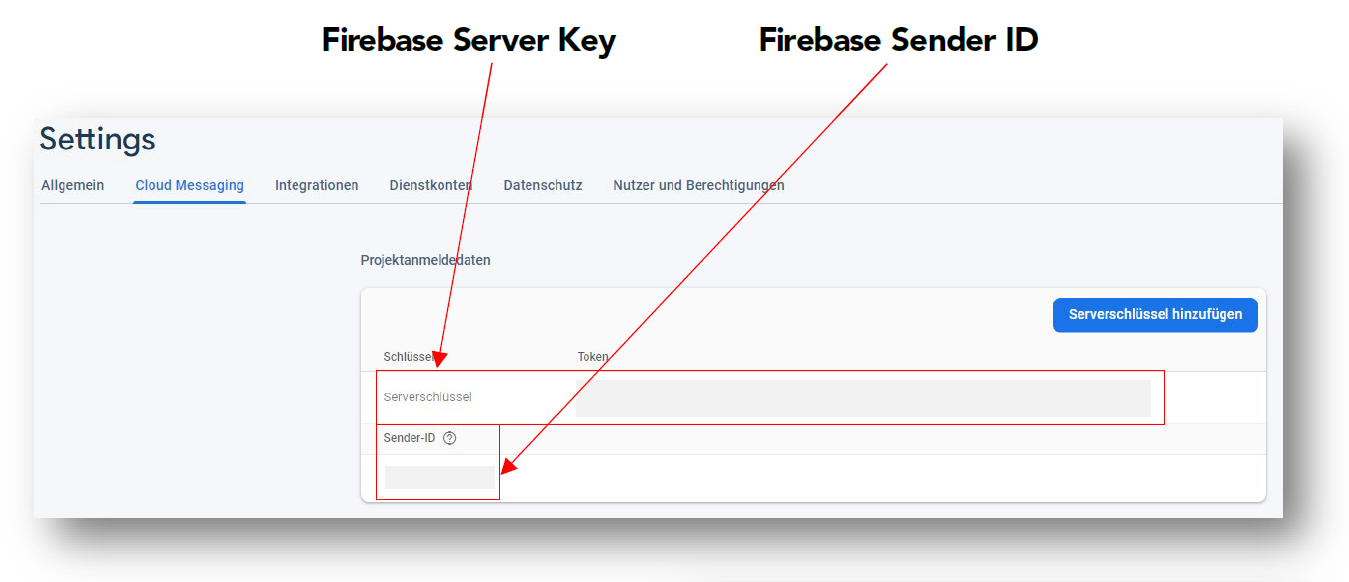
Navigate to "Cloud Messaging".
-
Here you will find the "Firebase Server Key" and your "Firebase Sender ID".
| This authentication method will deprecate toghether with the FCM legacy API in mid-2024. Please see step 4 to proceed with the most recent authorization method. |
| If You do not know which FCM API your push.delivery app is using, refer to this guide. |
-
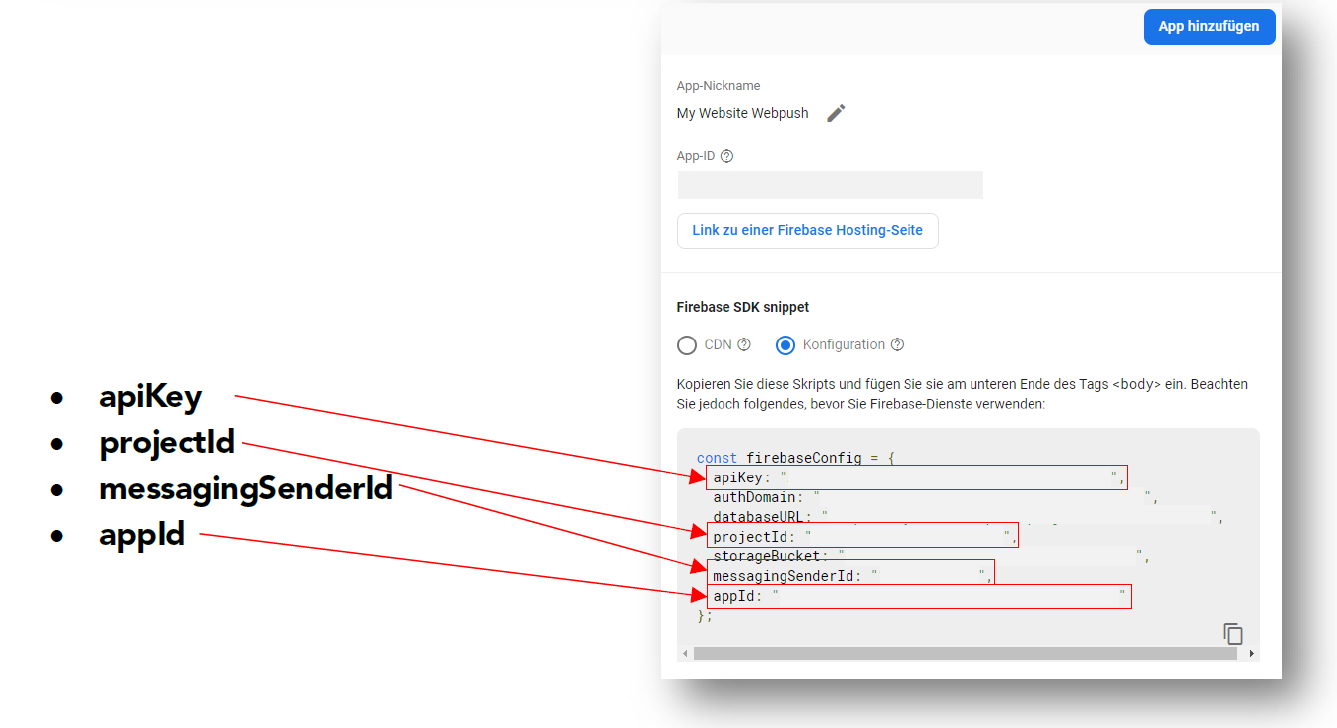
Now navigate to “General” and into the Webapp that you created.
-
In your snippet you will find the other needed credentials:
-
apiKey
-
projectId
-
messagingSenderId
-
appId
-
Step 4 - Get your Service Account Key File
| We cannot do support/documentation for Google Firebase. For up-to-date information, see the official Google Firebase Documentation |
-
Navigate to "Service Accounts".
-
Here you will find the "Firebase Admin SDK".
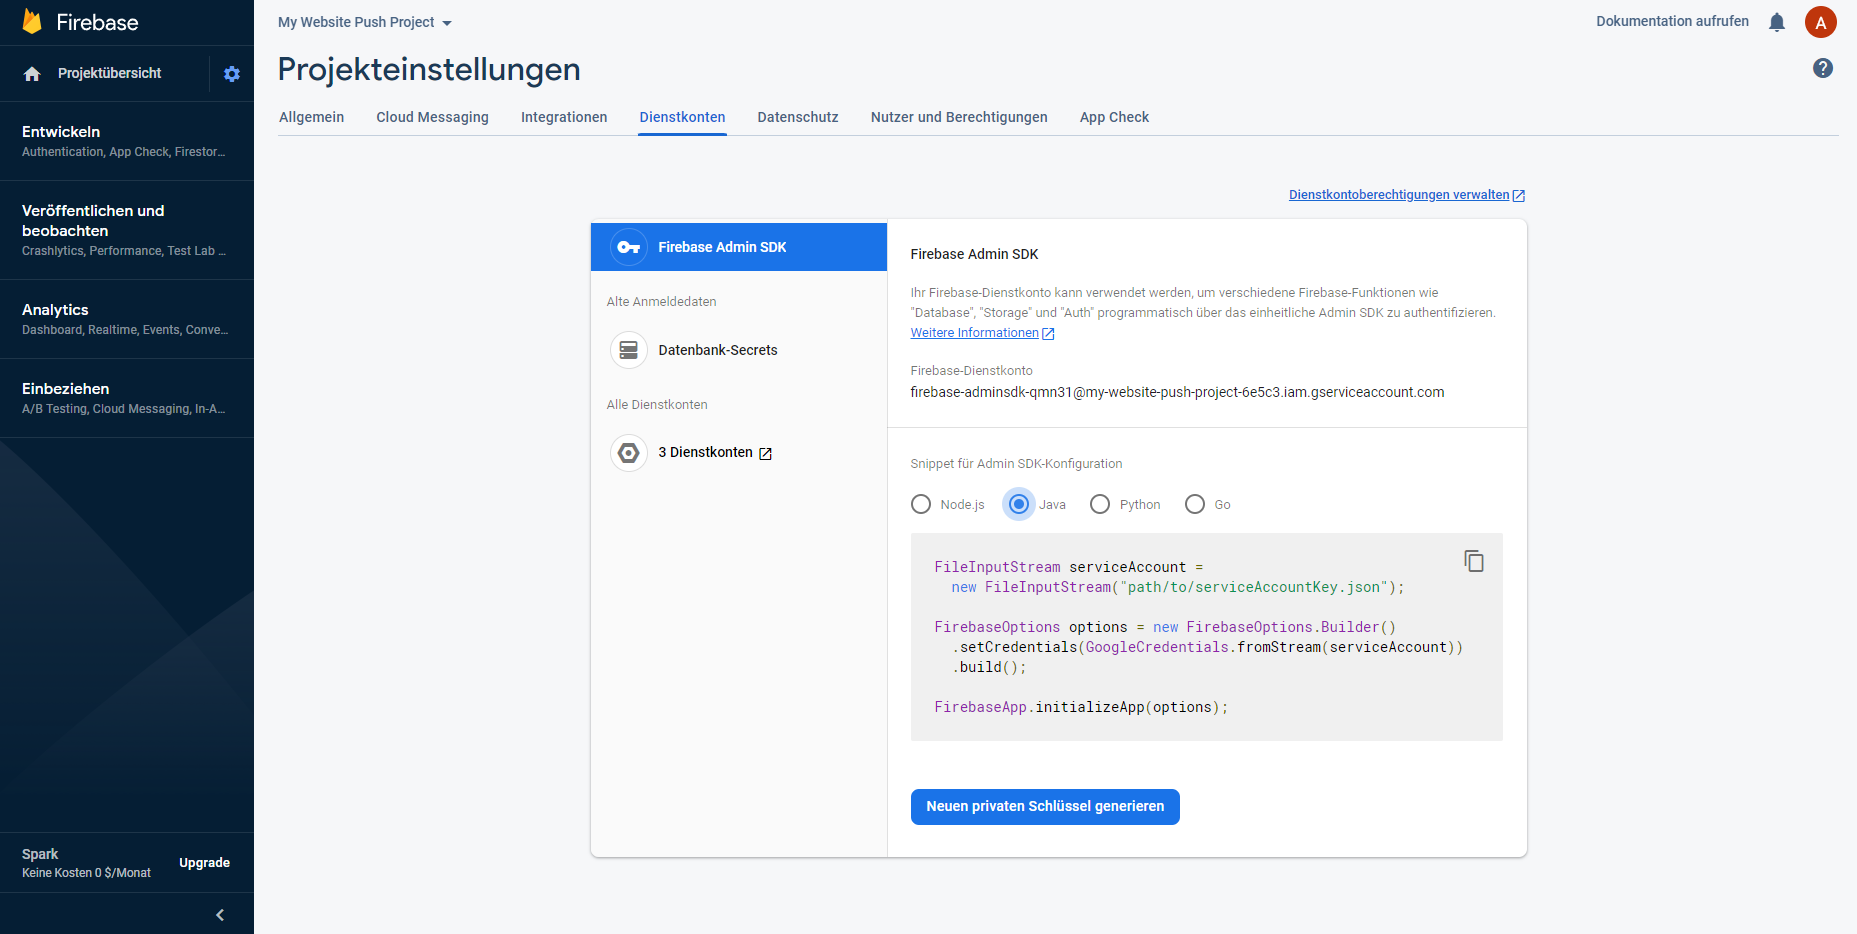
-
Select under "Snippet for Admin SDK-Configuration" Node.js.
-
Click on "Generate new private Key"
-
Download the generated JSON file
Step 5 - Insert the Service Account Key File into the ethinking push console
-
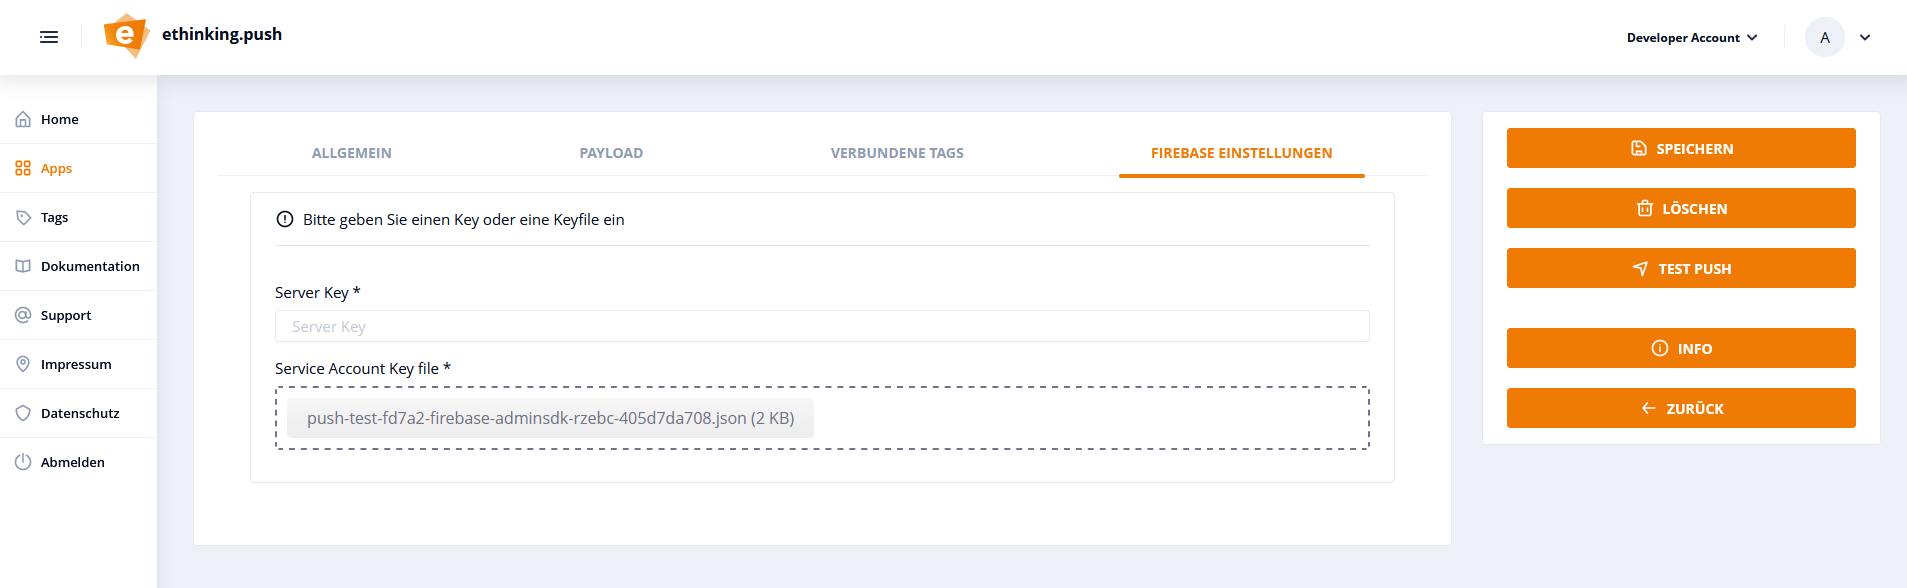
Open up the ethinking.push console
-
Navigate to your Android app
-
Open "Firebase Settings"
-
Place here the Service Account Key File
| If you are migrating from Legacy and have already inserted a Server Key, the uploaded File will have priority over the Server Key. It is also still possible to insert the Legacy Server Key here. |