Setup the Webpush library for Headless Mode
If you want to build your own webpush-UI we provide a Headless Mode with some integrated functions.
Step 1 - Download the Library package
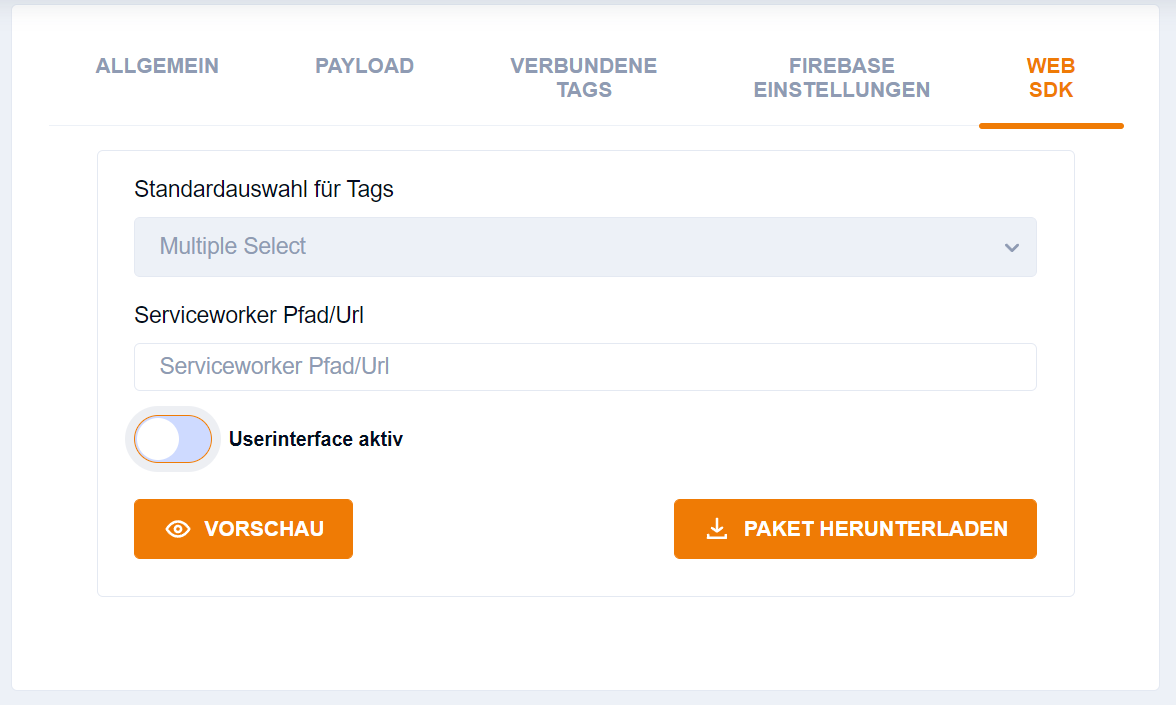
When you click the "Paket herunterladen"-Button you will receive a zip-package with the webpush-folder containing all the files you need. The most important one is webpush.js: this is the startpoint connecting all the logic of the webpush-library. You will also receive the files for UI Mode if you later want to switch. For that you have to change the uiActive parameter to "true" in the provided config.json.

Step 1 - Download the Library package
When you now click the "Paket herunterladen"-Button you will receive a zip-package with the webpush-folder containing all the files you need. The most important one is webpush.js: this is the startpoint connecting all the logic of the webpush-library.
Step 2 - Upload the files to your website
Extract the zip-package and place the webpush-folder on the top-level of your website (e.g. "www.mywebsite.de/webpush")
Step 3 - Place the embed code into your website
For implementing the Webpush, you need to place an embed code in the frontend of your website.
This is the default embed code:
<script src="Your path to the webpush library goes here"></script>      (1)
<script type="text/javascript">
    window.addEventListener('load', () => {
        //check if user allows push notifications
        if (Notification.permission === "granted") {
            //push notifications allowed, initialize the push library
            pushDelivery.init()
        } else if (Notification.permission === "default") {
            //push notification permissions not set, ask for permission
            Notification.requestPermission()
                .then(function (permission) {
                    if (permission === "granted") {
                        pushDelivery.init()
                    }
                })
        }
        //if the user does not allow push notifications the push library will not be started
      }
    )
</script> (2)| 1 | This is the path to your uploaded "webpush.js" e.g. "www.mywebsite.de/webpush/webpush.js" |
| 2 | This starts the subscription process based on the users permissions as soon as a user enters your page. If you don’t want to start the process imediately, do not embed this script. |
Place the embed code into an area where it can be accessed with all page loads, e.g. the <head> area.
And that is it!
If you followed all these steps, your Webpush should work and with the next pageload your visitors can subscribe and you will be able to send Push messages to their browser.
Library functions
All functions start with pushDelivery. (e.g. pushDelivery.init())
-
init() → initializes the library: starts the firbase-database, serviceworker and subscribes user to the default tags specified in the config.json
-
getDevice() → returns the subscrbed device
-
getTags() → returns all tags as ids connected to your push app
-
getDefaultSubscriptionTags() → returns the default subscription tags as ids
-
getSubscribedTags() → returns the currently subscribed tags as ids
-
subscribeTo(tag) → subscribes to a tag. "tag"-argument is the id of a tag
-
unsubscribeFrom(tag) → unsubscribes from a tag. "tag"-argument is the id of a tag
-
getArchive() → returns all previous pushes a user has received
JavaScript example to start subscripton process on a button click
If you don’t want to start the subscripton process directly on entering your page you can also add an eventlistener to a button click:
yourButton.addEventListener('click', () => {
    //check if user allows push notifications
    if (Notification.permission === "granted") {
        //push notifications allowed, initialize the push library
        pushDelivery.init()
    } else if (Notification.permission === "default") {
        //push notification permissions not set, ask for permission
        Notification.requestPermission()
            .then(function (permission) {
                if (permission === "granted") {
                    pushDelivery.init()
                }
            })
    }
    //if the user does not allow push notifications the push library will not be started; you should consider to give the user a hint that they can't subscribe if they haven't granted permission in the browser settings
    }
)