Setup Webpush in Push Delivery Console
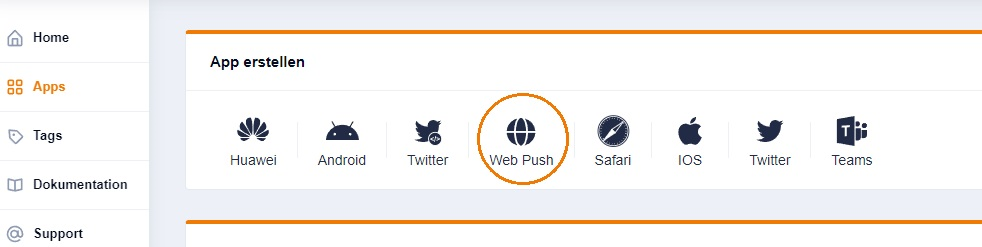
Please go into the "Apps" tab and add a new Webpush App.
You will be directed to the settings-page for your new app.
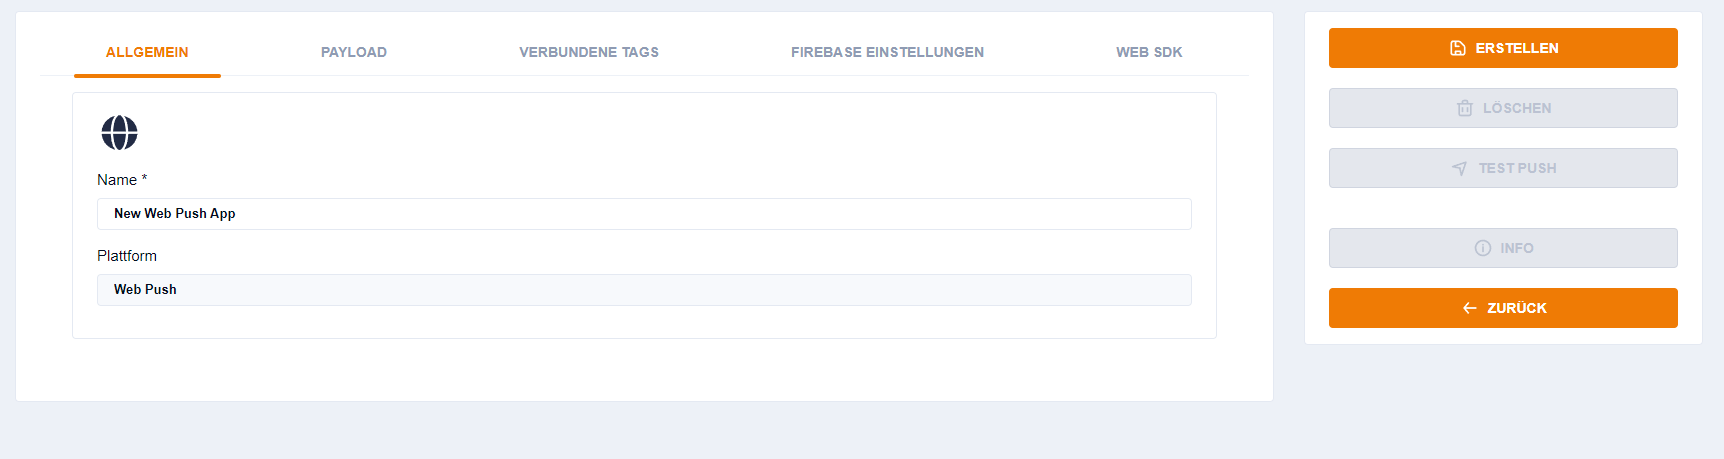
Tab "Allgemein"
You can give your app a unique name. The plattform is automatically added and is a read-only field
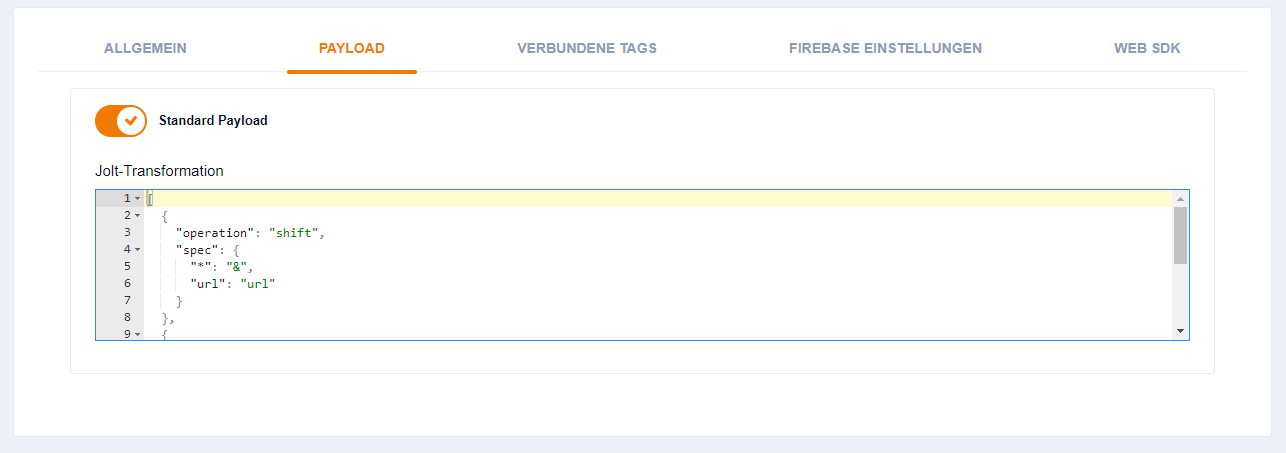
Tab "Payload"
You can define what kind of Information will be send with your pushes. You can use our default payload-template or customize your own. Further information can be found here.
Tab "Verbundene Tags"
Here you will find all the tags you created. With a checkbox you can select the tags you want to connect to this app. More about tags can be found here
Tab "Firebase"
In this tab, you will have to enter your firebase-credentials. How to register for Firebase and retrieve the needed credentials can be read in this section
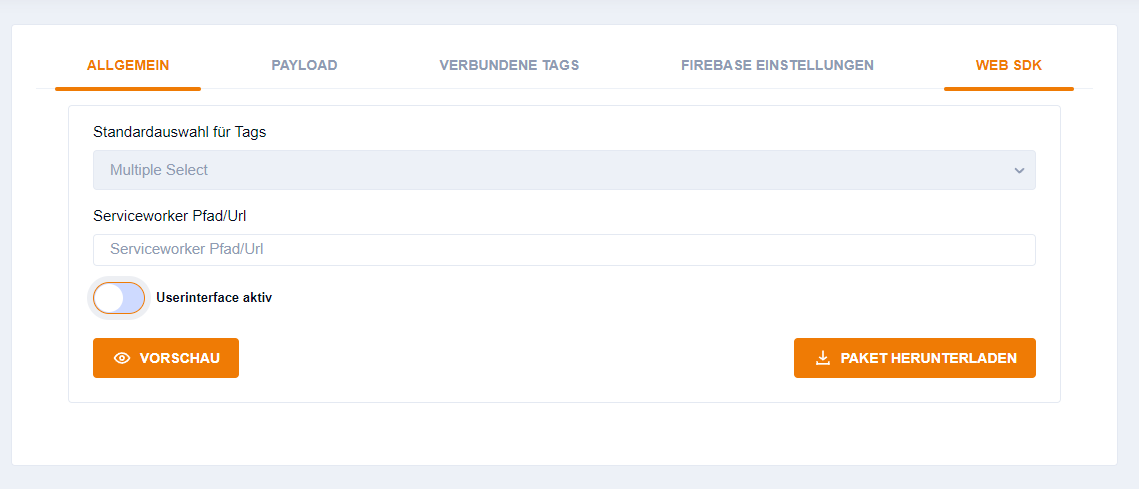
Tab "Web SDK"
Here you can select the tags that will get automatically subscribed to if a user subscribes for your push notifications.
The Serviceworker Path is only needed if you don’t place the push library files as it is explained in UI Mode Setup or Headless Mode Setup. You can also use your own serviceworker and specify it’s name and path here.
You can also select if you want to use UI or Headless Mode (Userinterface aktiv). The customizable options for UI-Mode are explained in detail here.
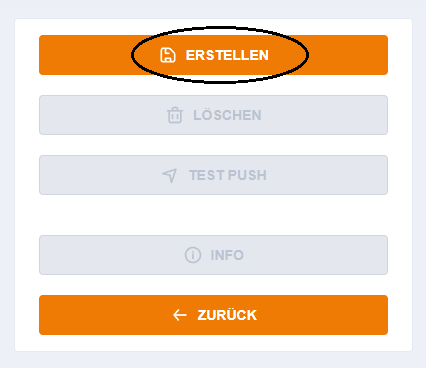
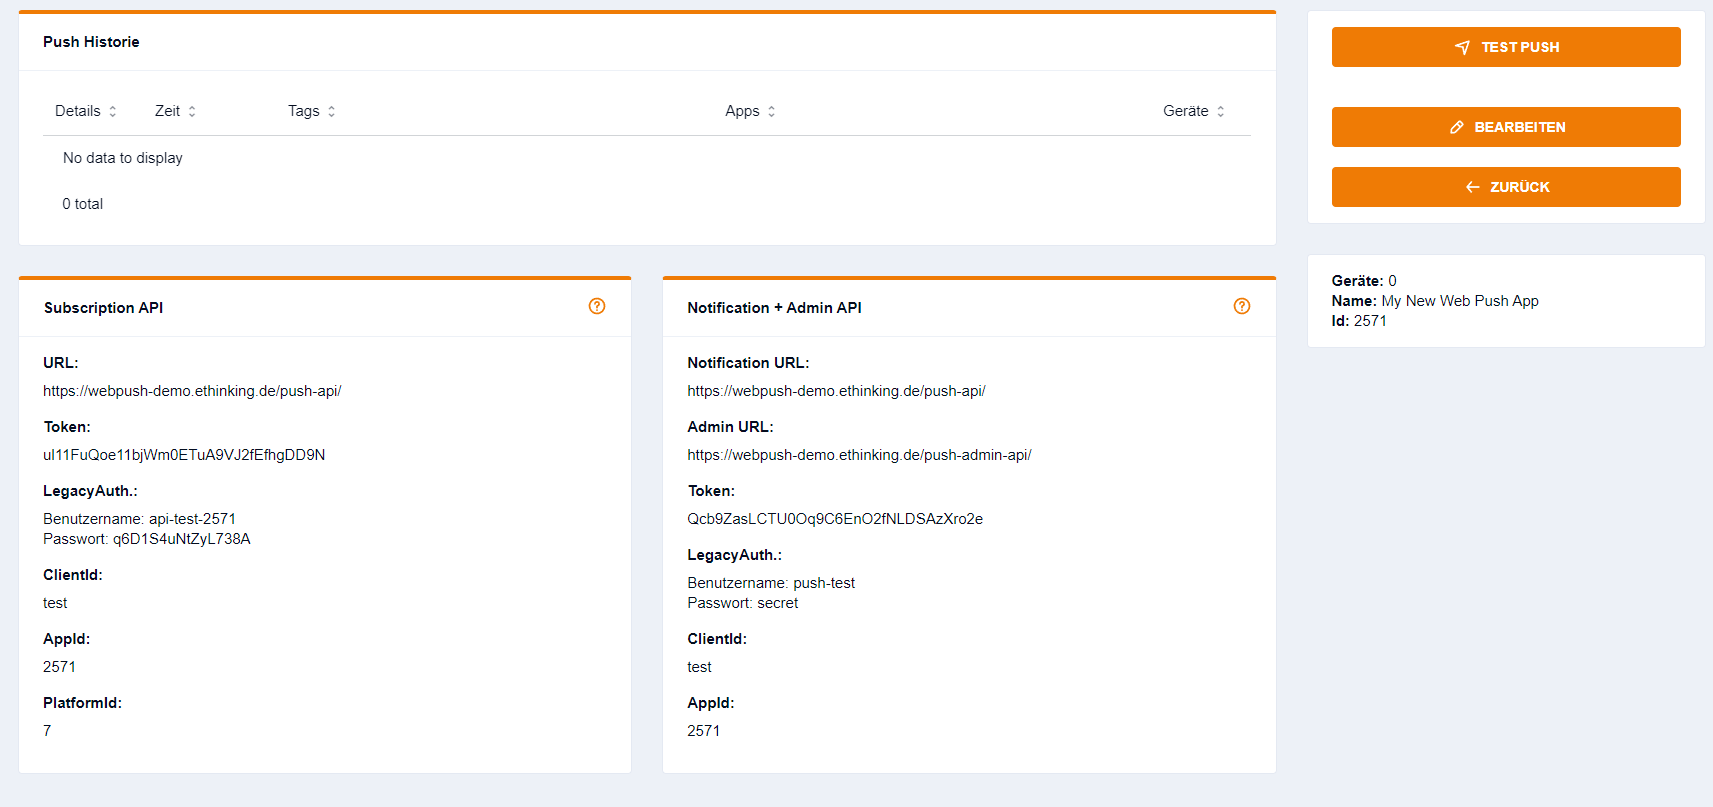
After sucessfully creating the App for Webpush you can click on "Info" to get all relevant Information for your app.